How to Separate Garlic Cloves for Planting – Complete Guide for Large Commercial Garlic Farms
Suitable for growers managing over 80 hectares of garlic fields, proper clove separation directly improves germination rate, uniform seedling growth and final bulb yield. Below is the standardized, efficient workflow for splitting garlic bulbs for plantation use.
1. Choose High-Quality Mother Garlic Bulbs First
Only use mature, disease-free, fully cured garlic bulbs for seeding:
- Select plump, firm bulbs with intact outer skins; discard soft, moldy, sprouted or damaged bulbs.
- Prioritize large-sized bulbs: bigger cloves produce stronger garlic plants and larger harvest bulbs.
- Keep bulbs dry and stored in cool, shaded ventilation for 2–4 weeks of curing before splitting. Do not split wet garlic, which easily triggers rot during germination.
2. Pre-Process the Whole Bulb
- Remove dry dirt, loose outer papery skins and residual stems from the bulb surface by hand or light air blowing.
- Trim excess dry stalks at the top and root hairs at the bottom with scissors, avoiding cutting into the base plate of cloves.
- Gently squeeze the whole bulb from the sides to loosen the connection between cloves and the central basal plate, which eases separation without breaking clove bottoms.
3. Mechanical Separation (Recommended for Farms Over 80 Hectares)
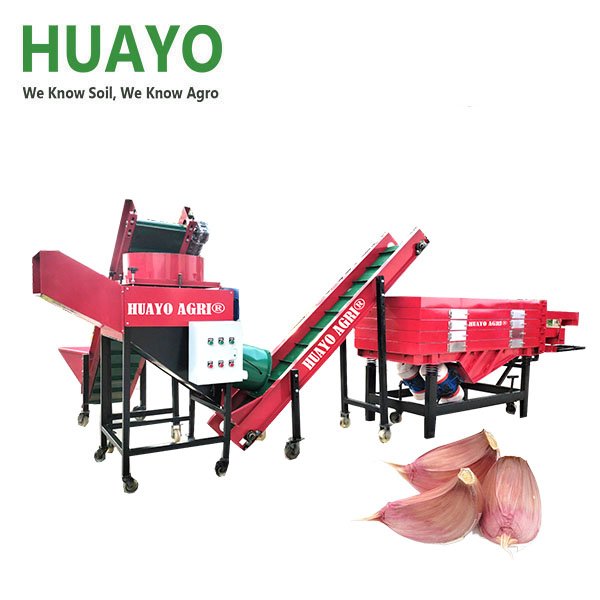
For large commercial garlic plantations with massive seed garlic demand, HGBS-3 Garlic Seed Splitting and Sorting Machine by HUAYO GARILC drastically cut labor time and cost:
- Feed whole cured garlic bulbs into the hopper uniformly.
- Internal soft rubber rollers and vibration mechanisms gently separate cloves via friction and shaking, avoiding hard cutting damage.
- Built-in screening screens automatically classify cloves by size, separating large seed cloves, small waste cloves and bulb skin debris.
- Advantages: 5–10 times higher efficiency than manual work, reduce labor expenditure by over 70%, standardize clove size for consistent field sowing, perfectly match the hydraulic garlic planting integrated machine from HUAYO GARLIC.
Post-Separation Disinfection & Storage Before Sowing
- Clean separated cloves to remove loose husks and dust.
- Disinfect cloves with approved agricultural fungicide soak or dry powder coating to suppress fusarium, root rot and white rot diseases.
- Spread cloves thinly on ventilated racks to air-dry for 1–2 days until surface moisture evaporates.
- Store seed cloves in breathable mesh bags under cool, dry, dark conditions until planting. Avoid sealed plastic bags that cause mildew.
Key Tips to Avoid Common Mistakes
- Never split garlic with water-wet bulbs — high moisture leads to clove rot pre-planting.
- Do not peel off the thin protective skin on individual cloves; the papery layer protects against pathogens during germination.
- Small cloves are not suitable for commercial large-scale planting; they result in weak plants and undersized garlic bulbs.
- Match clove size with the hole spacing of your mulch punching machine: large cloves need wider hole distances for sufficient growing space.
Quick Inquiry Note
If you operate a large garlic farm above 80 hectares and need efficient garlic clove splitting machinery matched with our all-in-one rotary tillage, mulching and punching planter, send us your farm details for a complete mechanized garlic planting solution.